I’ve always loved the sewing techniques used in children’s clothing. They often feature intricate details that are beautifully executed with a lot of effort. But I am not a fan of creating things that look too girly, and I can’t make myself put that much effort into something that would be outgrown.
So for the past few months I’ve been obsessed with using two of these techniques — pintucking and smocking — in an upholstery context. I’m giddy about the idea of hijacking these techniques; they are traditionally applied to light weight fabric for little girl’s clothing!
The artist’s lament

Although I love working with vinyl and upholstery fabric, it sometimes takes me a while to actually jump in and try new ideas like this. The fear of failure weighs heavy. When I look at the finished attempt, is it going to bring me joy like I hope it does? What if it doesn’t? Did I just waste time and money on a worthless idea? Will my inability to find a satisfying result stifle other creative attempts?
I talked to my dad about this fear, and he reframed my thinking. “It’s R & D — research and development. That’s never a waste of time,” he said. “Even if this project doesn’t work, it may lead to an idea that you haven’t considered before.”
Process is progress
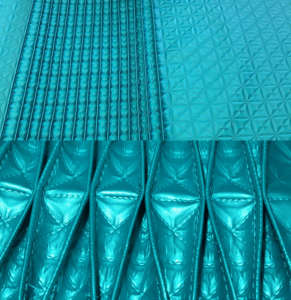
So I started by pintucking an amazing vinyl that has a raised pattern on it. Pintucking is a method of sewing little tucks in the face of fabric to create texture. I’m really happy with the result; it’s simple but interesting to look at. But I couldn’t stop there — I continued to tack pieces of the pintucks together to create diamonds on the top of the fabric. The result might be too busy for my taste. Just writing this makes me remember another variation I want to try.
 Trial and error and error…
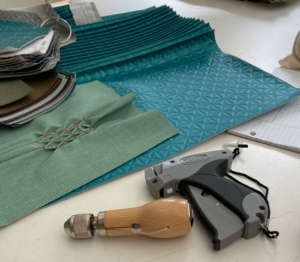
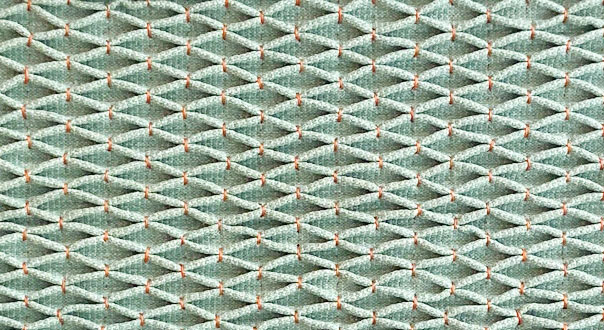
Although I was pleased with pintucking, I decided to move on to what was really consuming me: smocking. Everything I read says that the lighter the fabric, the better smocking will work. Oh well — I’m working with one of the heaviest fabrics — vinyl! Man, this led me down some serious rabbit holes that included a hand tool for sail and shoe making as well as a tag gun. Here’s what I did:
- Marked up the back of the fabric in a grid pattern.
- Took long running stitches along the horizontal lines. This has to be done by hand!
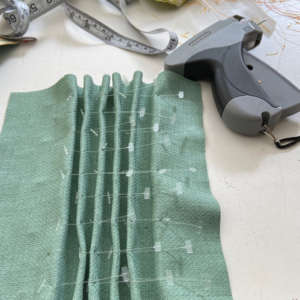
- Once the stitches are in, I pulled on each one and cinched up the fabric into pleats.
- Now I knew exactly where to tack each pleat to its neighbor. Without the pleating done first, it was really hard to just attack it from the front with no markings. I didn’t want to mark the front of the fabric. Even if I use chalk or disappearing ink, once the stitches are in, it just looks messy. Getting the fabric to pleat nicely going at it backwards didn’t really work.


Back to square one
So after the experiments with different tools I realized that there isn’t really a better way to do it then the painstaking original method. That’s going to lead to some really tired hands. Why? Each pair of pleats that you tack together is four layers of heavy vinyl. I thought that using the tagging gun would allow me to tag through all the layers and hold them together. It does, but it’s just one more step that doesn’t get me out of hand stitching. However, it proved useful for the heavier fabrics because of the hole it punched through the material for my needle. The sewing awl didn’t work for this, but I’m saving it for another project. One can never have enough tools!
Content, but no conclusion
So that’s where I am in this process. I have some good leads. I love how both efforts look, smocked vinyl is likely never going to be something I can produce in volume. I will, however, produce a few pieces of furniture with smocked bits just so I can jump up and down and say, “I smocked vinyl!” And I’m o.k. with no one caring that I did it. Like many artists, I create for my own eye and entertainment. But I hope for customers who appreciate that the most beautiful things are only possible through failure.


